How to Upload a Decal on Roblox
A Roblox decal is an image file you upload to Roblox, get back as an asset ID, and apply to any part in Studio. Make the image in any editor (PNG or JPG is a practical starting point), upload it from Creator Dashboard → Development Items → Decal asset type, check moderation and access for the target game, then use the image in a Decal object's ColorMapContent property. The image stretches to fit the part's face — that is the difference between a decal and a texture, which repeats instead.
Roblox decals are how custom art gets into the platform: signs, wall posters, GUI panels, character faces, UI icons. This guide combines Roblox Creator Hub documentation for moderation and Studio with a real upload example. The file rules below are the single-asset form's displayed guidance checked on October 13, 2026; they are not a test of every uploader or its processing limits.
What is a Roblox decal?
A Roblox decal is a Decal object: an image that stretches to fit the surface of a part or union. A Texture object is the other option: it repeats horizontally and vertically across the surface instead of stretching. Same upload, same asset ID — the object you attach it to decides the behavior. A Roblox decal is what you want for one image per surface; textures are for tiling patterns like brick or grass.
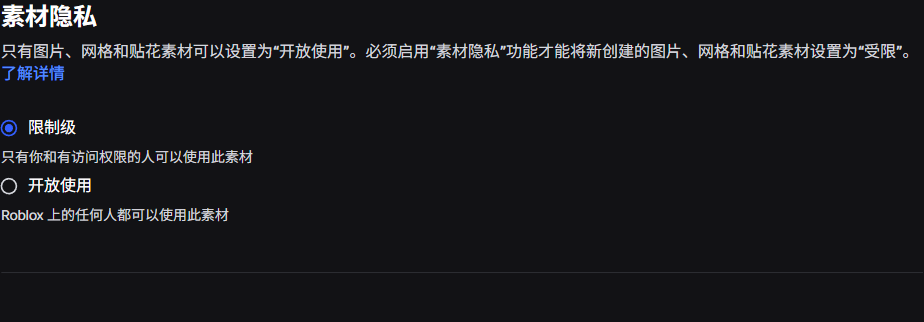
The image itself lives in Roblox's cloud with a unique asset ID. Roblox documents an exception for your own assets in your own published games: they remain accessible to you regardless of their privacy setting. For collaborative, group-owned, or differently owned games, check the asset and game permissions. This upload example did not test game loading.
How do you upload a decal to Roblox?
- 1Draw or export the image. PNG or JPG is a practical starting point. Check the current upload form for accepted formats, file size and dimensions.
- 2Open Creator Dashboard. Choose the asset owner, open Development Items, select the Decal asset type, then open the upload form.
- 3Upload and name it. Pick the file, give it a searchable name and submit. Check moderation and asset permissions separately.
- 4Copy the asset ID. Copy the created asset ID and check moderation separately. Use the uploaded image through the ColorMapContent property in Studio.
- 5Apply it in Studio. Add a Decal object to a part, pick the Face (Top/Bottom/Front/Back/Left/Right), paste the asset ID. The image stretches to fit the part surface.
A PNG upload example
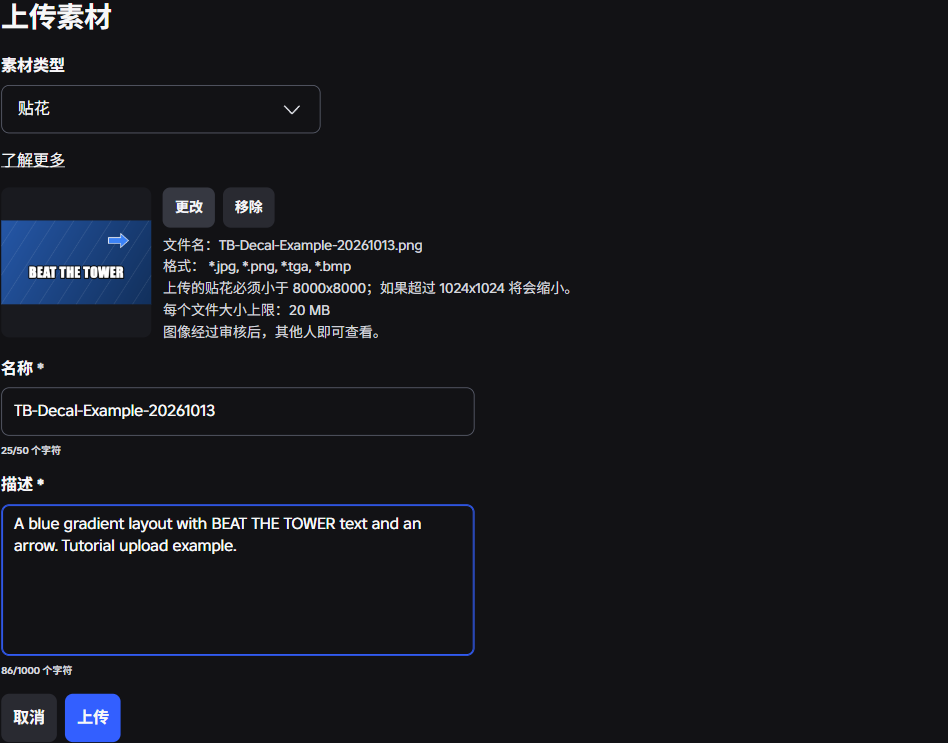
This example uses a gradient PNG exported by ThumbBlitz. It created Decal asset125552627732483, named TB-Decal-Example-20261013. Roblox's authenticated asset endpoint returned Approved on October 13, 2026. The asset kept Restricted access. This is one upload example; moderation approval and permission to use an asset in a game are separate checks.
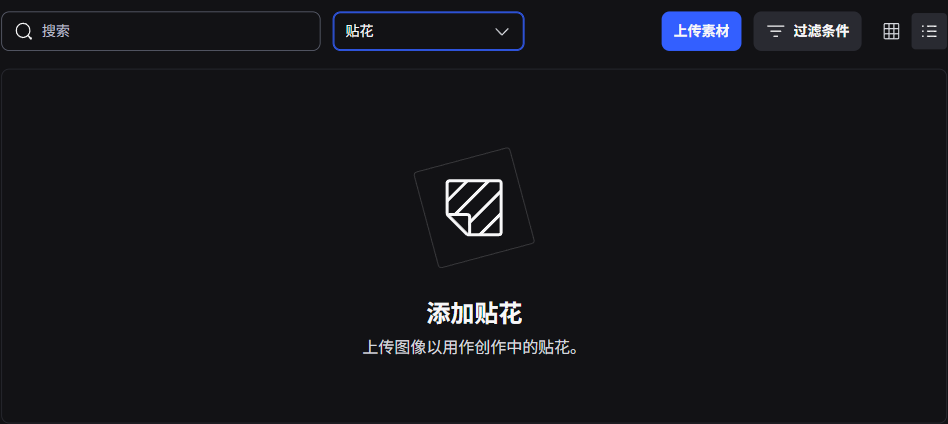
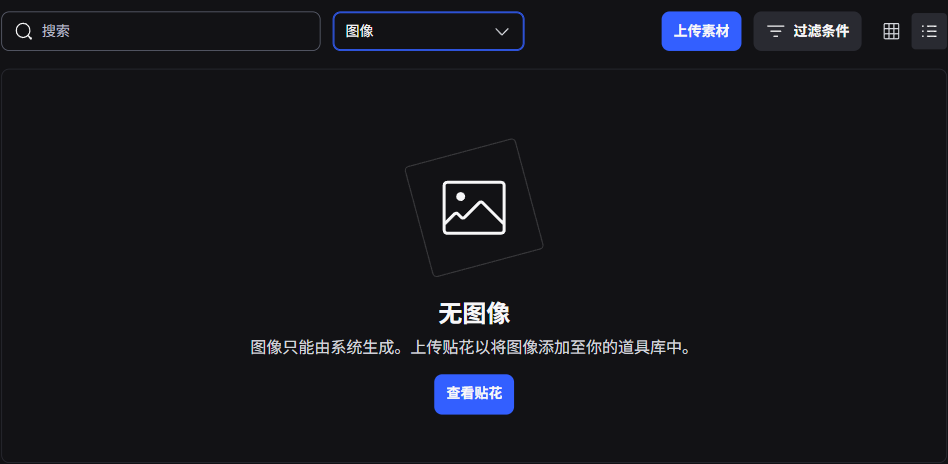
Choose the creator or group that should own the asset. In Creator Dashboard, openDevelopment Items, choose the Decal asset type, and use the upload form. The Images view explains that images are system-generated and directs you to upload a decal to add its associated image. Menu names here are English translations of the Chinese interface used for this example.
ThumbBlitz prepares the image file; it does not upload the asset to Roblox or bypass moderation. This example does not include a Studio application or player-visibility test.


How do you make a Roblox decal?
Make the artwork in any image editor — the tool matters less than the file you end up with. Export PNG when you need transparency (GUI panels, signs with cut-out letters) or JPG for photographs, and keep the composition square: a decal maps onto the flat face of a part, so a square image fills it without letterboxing.
Check the current upload form's displayed rules before you finish the artwork — the formats, file-size limit and dimension ceiling it lists are covered in the next section. If you would rather draw in the browser, the Roblox decal maker exports an upload-ready PNG at canvas size.
What image specs does Roblox require for decals?
The single-asset form checked on October 13, 2026 lists JPG, PNG, TGA, and BMP. It states a 20 MB limit per file, requires dimensionssmaller than 8000×8000, and says uploads larger than 1024×1024 will be downscaled. These are the form's displayed rules. We did not test the size boundaries or verify the server-processed image dimensions; do not treat this observation as a universal specification for every Roblox uploader.
For a Roblox decal, two practical format choices are: use PNG when you need transparency(GUI elements, signs with cut-out letters) and JPG for photographs, where it produces a smaller file at the same visual quality. Non-square images are accepted, but a square composition maps cleanly onto the square faces most decals end up on.
A decal is not a thumbnail, and the two do not share a size budget. Decals go through Development Items and get downscaled above 1024×1024, while a game thumbnail is uploaded from the place's Game Settings as a 16:9 1920×1080 image. If you came here looking for the cover shown on the game page rather than an image on a part, the numbers are in the Roblox thumbnail size guide.
What does moderation check, and how long does it take?
Every Roblox decal upload passes a moderation check before other users can see or interact with it in published games. The rule is short: images must follow the Community Rules and the Terms of Use — no copyrighted material you do not have rights to, no personal information, no inappropriate content, no trademark misuse beyond fan references the rules allow.
Check moderation separately from the Dashboard list's Source column. In the example above, Uploaded describes provenance; Approvedcame from the asset API. Approval does not grant a game permission to use a restricted asset. If Roblox rejects an upload, read the moderation notification before revising the artwork.
One extra trap: archiving a Roblox decal from Creator Dashboard removes it from the websiteand makes it unusable in every game, including your own. Do not archive an asset you still need in a game.
How do you apply a decal to a part in Studio?
These instructions follow Roblox'sTextures and decals documentation. Studio was not available for this upload example, so these steps were not tested in Studio. Game permissions and visibility to players were not verified.
In Explorer, select a part → add a Decal object → in Properties, set the Face (Top, Bottom, Front, Back, Left, or Right) → clickColorMapContent and either pick a decal you uploaded before or paste the asset ID. Optional tweaks: Color3 tints the image with an RGB color, andTransparency runs from 0 (fully visible) to 1 (invisible).
Can't tell which face is which? Right-click the part and choose Show Orientation Indicator — Roblox draws a face marker plus arrows for front and top.
What should you check when a decal does not show up?
| What you see | What to check next |
|---|---|
| The image is not visible to players in your published game | Check moderation. An asset still awaiting review cannot be shown to players in a published game. |
| Your account can access the asset, but the game cannot load it | Inspect creator and game permissions separately. Review Studio Output; the game can need permission separately from the account editing it. |
| An asset ID does not load the intended image | Confirm the selected asset, owner and ColorMapContent value. A Decal has an Image dependency; inspect that image's access for a restricted asset. |
| The image appears on the wrong side | Change Face on the Decal. Show Orientation Indicator helps identify the part's front and top. |
| The image is invisible or tinted unexpectedly | Inspect Transparency and Color3 on the Decal. |
| An image that previously worked has disappeared | Check whether the asset was archived. Archived assets become unusable in games, including the owner's games. |
Check the actual permission state instead of assuming every image is private. Setting an asset to Open Use is irreversible, so review who needs access before making that change. These are documented troubleshooting checks; this example did not reproduce a Studio permission error. See Asset privacy,Assets, and Textures and decals.
“Image is not set to Open Use” — what that error means
A Decal is a wrapper: the object you place in Studio points at a separate Imageasset. When you try to share, copy or open-use the decal, Roblox checks that dependency first. If the underlying image is still set to Restricted, the operation is refused with a message along the lines of “you cannot make this decal open use if the dependent image is set to restricted” — the decal itself is not the problem, the image behind it is.
The fix is to change the image asset's privacy, not the decal's, and to do it deliberately: moving an asset to Open Use is irreversible on Roblox. If you only need the art in your own game or group, leave both assets restricted and rely on your own ownership instead of opening them. The behaviour is documented in Roblox'sasset privacydocumentation; this example did not attempt an Open Use conversion.
What should the decal image itself look like?
If you are starting from text rather than finished artwork — a shop sign, a zone label, a banner — the in-browserRoblox decal makerlays bold outlined type over a backdrop and exports the PNG ready for the upload steps above. The use-case table that follows tells you which shape and contrast level to aim for.
| Use case | Shape | Design note |
|---|---|---|
| Sign / poster | 1:1 or 4:3 | Highest contrast — viewed at an angle, from distance, in dark rooms. |
| GUI element | 1:1 PNG | Transparent background; keep text inside a safe margin. |
| Wall texture stand-in | Any | If it tiles, use a Texture object instead — decals stretch, they do not tile. |
When do you need a custom decal?
Anything a part cannot express with its built-in material — text, logos, artwork, UI.
- ▸A sign or leaderboard needs words on it.
- ▸A wall needs art that no stock material provides.
- ▸A GUI panel needs a custom icon or frame.
- ▸A face or billboard needs a specific image.
The five-step recap
Same order every time, from blank image to rendered part.
- 1Export PNG or JPG and check the current upload form for accepted formats, file size and dimensions.
- 2Choose the owner, open Development Items, select the Decal asset type and open the upload form.
- 3Wait for moderation to clear.
- 4Copy the asset ID.
- 5Apply it to a Decal object in Studio and pick the face.
What a decal cannot do
Boundaries worth knowing before you design around them.
- !It does not tile — for repeating patterns use a Texture object.
- !It cannot bypass moderation — unapproved images never render for players.
- !It stretches rather than crops — a wide image on a square face distorts.
- !It cannot be edited after upload — change the source and re-upload for a new ID.
›Why is my Roblox decal not showing up?
Check moderation, creator and game permissions, the linked Image asset, archive status, Face, Transparency and ColorMapContent. Approval alone does not prove that a game can load the asset; Studio Output can identify permission problems.
›How big can a Roblox decal image be?
The single-asset form checked on October 13, 2026 lists 20 MB per file, dimensions smaller than 8000×8000, and downscaling above 1024×1024. These are displayed rules; size boundaries and server-processed dimensions were not tested. Check the current form.
›What is the difference between a decal and a texture in Roblox?
Same upload, different behavior: a Decal object stretches the image to fit one face of a part, a Texture object repeats it across the surface. Use decals for one-off art, textures for tiling patterns.
›Do Roblox decals cost Robux?
Uploading images as a regular creator is free; the Robux upload fees apply to clothing and marketplace items, not decal images. The limit is moderation time, not price.
›Can I use any image as a decal?
No — every uploaded image must follow the Roblox Community Rules and Terms of Use. Copyrighted logos, real people's photos without consent, and inappropriate content get moderated. Fan art of Roblox itself exists in a gray zone the rules define; read them before uploading.
›How do I upload decals on Roblox step by step?
Export the image from any editor, open the Creator Dashboard, choose the asset owner, open Development Items, pick the Decal asset type, select the file and submit. After moderation, copy the asset ID and apply it to a Decal object in Studio. These are the same five steps listed above and they follow the documented Roblox flow.
›Can I upload a decal without Roblox Studio?
Yes. The upload happens in the browser inside the Creator Dashboard; Studio is only needed later to place the decal on a part. You can upload, get the asset ID and stop there.
›Why does Roblox say the image is not set to Open Use?
Because a decal depends on a separate Image asset and that image is still Restricted. Roblox refuses to open-use the decal until the image itself is set to Open Use, which is irreversible, so only do it when the art genuinely has to be shared beyond your own account, group or game.